This Instant Pot Thai red curry and jasmine rice combo meal is vegan, comforting and perfect for busy weeknights. Made with tofu, pumpkin and store-bought curry sauce, it’s a fuss-free plant-based dinner cooked in one go.
Follow us on Pinterest for delicious pins. Join our Facebook group for more recipes, quick tips and hacks.

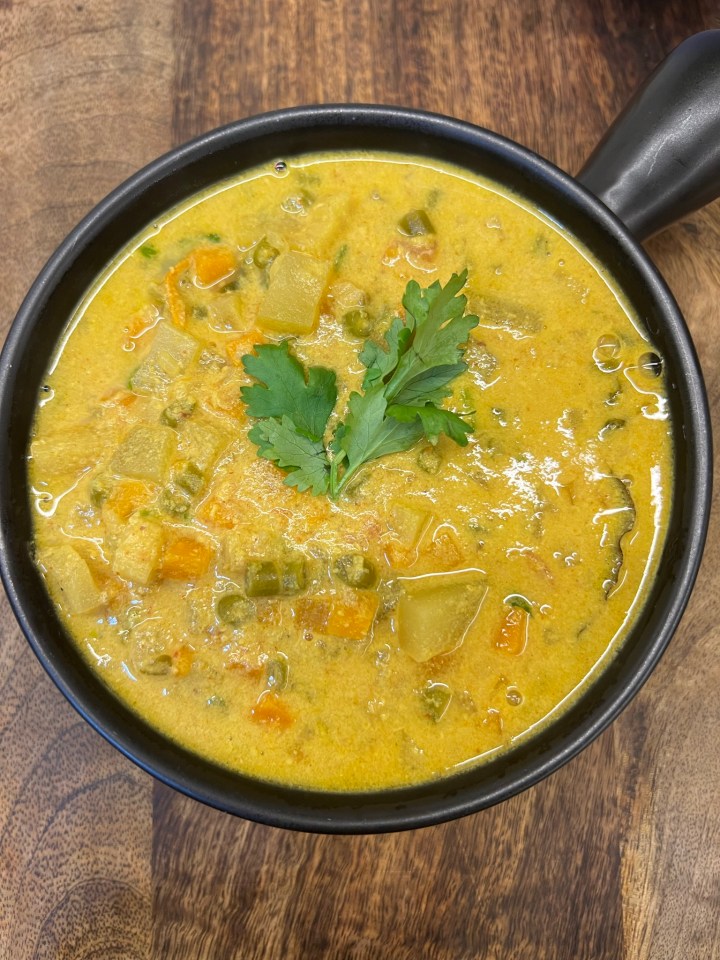
Easy Instant Pot Thai Red Curry Meal
This healthy, plant-based Thai red curry with jasmine rice comes together easily in the Instant Pot as a pot-in-pot combo meal. Using store-bought curry sauce reduces prep time, making this one of my favorite weeknight dinners or weekday lunches.
I will be honest here. This is not the authentic way to make Thai curry. What this meal is — a humble attempt to eat wholesome, Asian-style food with whatever is available locally.
Breaking the bank for grocery shopping is not my style. I enjoy working with fresh, regional produce and accessible ingredients. For example, my Lahsooni Palak uses frozen spinach that is readily available in German supermarkets.
To make this meal, I used store-bought Thai red curry sauce from Rewe, galangal paste and store-bought vegan sambal. Most supermarkets in Germany have a brilliant selection of Asian sauces.
You will find vegan Massaman curry paste, green curry paste, and even Tikka Masala sauce. I am simply leveraging these pastes to put together a wholesome, plant-based Instant Pot meal.
Ingredients
Apart from jasmine rice, this red curry calls for fresh pumpkin and tofu. Aromatics like lemongrass and kaffir lime leaves, along with garlic and galangal paste, add depth and fragrance.
For crunch and texture, I have used cashews and peanuts. Both are optional and can be skipped to keep this meal nut-free. Coconut milk gives the curry a silky, creamy texture without making it heavy.
Extra-firm tofu (Tau Kwa)
does not need pressing. It is ready to go into curries and works well in fried rice and stir-fries. This is my personal preference and what I have used here.
You can also use high-protein tofu or regular tofu. While pressing tofu improves texture, it works just fine here even without pressing.
Variations
Vegetables that work well here include zucchini, mushrooms, baby corn, potatoes, broccoli, cauliflower, carrots and beans. Choose vegetables with short cook times, since the curry and jasmine rice are cooked together. If using potatoes, chop them into small cubes.
Switch the protein to plant-based chicken, veggie mince, soy strips or canned beans. My favorite option here is canned chickpeas.
For a very meaty curry, raw jackfruit works beautifully.
Other carbs you can use instead of jasmine rice include quinoa or white basmati rice. Both have relatively short cook times and are ideal for Instant Pot combo meals.
Pro Tips
In this recipe, timing is the boss. Matching cook times is often the key to successful one-pot and pot-in-pot meals, and this recipe is no exception.
No sambal paste? No problem. Use Sriracha or any chili sauce you have on hand.
Coconut milk–based curries should not be boiled on high heat. Coconut milk can curdle, resulting in an unpleasant texture. Once the coconut milk is stirred in, simmer gently for 1 to 2 minutes.
Make Ahead, Shelf Life and Freezing
Jasmine rice and Thai curry keep well in the fridge for 2 to 3 days. Store them separately in clean, fridge-safe containers.
Thai curry freezes well for up to 1 month. Allow it to cool completely, portion into 1-cup servings, label and freeze.
Thaw overnight in the fridge and reheat gently before serving.
How to Make Thai Curry and Jasmine Rice in the Instant Pot
Instant Pot Thai Pumpkin and Tofu Curry
Insert the inner pot into the Instant Pot. Plug in and press SAUTE mode on HIGH for 15 minutes. Wait for the display to read HOT.
Add coconut oil and allow it to heat for 30 to 40 seconds.
Add chopped lemongrass and kaffir lime leaves. Saute for 20 to 30 seconds to release the aroma.

Add chopped red onions and saute for 20 to 30 seconds.
Add garlic paste and saute for 1 minute.
Add chopped red bell peppers and fry briefly.
Stir in galangal paste and sambal paste.
Add cashews, ground spices and salt. Saute for 2 minutes.

Add pumpkin and tofu.
Stir in the curry sauce. Rinse the jar with water and add it to the pot. Mix well.

Press CANCEL.

How to cook Jasmine rice using pot in pot?
Wash the jasmine rice thoroughly in a colander.
Transfer the rice to a separate pot with water and salt.

Place a tall trivet inside the Instant Pot.
Place the rice pot on the trivet and cover.
Ensure the sealing ring is properly fitted. Close the lid and set the valve to SEALING.
Press PRESSURE COOK and set to 3 minutes on HIGH PRESSURE.
Allow the cooking cycle to complete, followed by 10 minutes natural pressure release.
After 10 minutes, do a gradual quick release and press CANCEL.
Carefully remove the rice pot and trivet.
Stir coconut milk into the curry.
Press SAUTE mode on NORMAL for 2 minutes and allow the curry to gently simmer.

Finish with chopped cilantro.

Garnish with roasted peanuts and serve hot alongside jasmine rice.


Instant Pot Thai Curry + Jasmine Rice Meal
Equipment
- 1 six quart Instant Pot
- 1 Tall trivet
Ingredients
For the curry
- 1 tbsp coconut oil
- 1 stalk lemon grass chopped roughly
- 2 kaffir lime leaves chopped roughly or torn
- 75 grams red onions chopped
- 1 tsp garlic paste
- 75 grams chopped bell peppers
- ¾ tsp Galangal paste
- ½ tsp smoked paprika
- ¾ tsp ground coriander
- Salt to taste
- ⅛ cup cashews
- ½ tsp Sambal paste
- 200 g Tofu cubed
- 150 g Pumpkin chopped into cubes
- 400 g Thai curry sauce I used store bought
- 2 cups water
- 200 ml low fat coconut milk
For garnish
- 2 tbsp cilantro chopped
- 1 tbsp roasted peanuts
For Jasmine rice
- 1 cup Jasmine rice
- 1 cup water
- ½ tsp salt
Instructions
- Insert the inner pot into the Instant Pot. Plug in and press SAUTE mode on HIGH for 15 minutes. Wait for the display to read HOT.
- Add coconut oil and allow it to heat for 30 to 40 seconds.
- Add chopped lemongrass and kaffir lime leaves. Saute for 20 to 30 seconds to release the aroma.
- Add chopped red onions and saute for 20 to 30 seconds.
- Add garlic paste and saute for 1 minute.
- Add chopped red bell peppers and fry briefly.
- Stir in galangal paste and sambal paste.
- Add cashews, ground spices and salt. Saute for 2 minutes.
- Add pumpkin and tofu.
- Stir in the curry sauce. Rinse the jar with water and add it to the pot. Mix well.
- Press CANCEL.
- Wash the jasmine rice thoroughly in a colander.
- Transfer the rice to a separate pot with water and salt.
- Place a tall trivet inside the Instant Pot.
- Place the rice pot on the trivet and cover.
- Ensure the sealing ring is properly fitted. Close the lid and set the valve to SEALING.
- Press PRESSURE COOK and set to 3 minutes on HIGH PRESSURE.
- Allow the cooking cycle to complete, followed by 10 minutes natural pressure release.
- After 10 minutes, do a gradual quick release and press CANCEL.
- Carefully remove the rice pot and trivet.
- Stir coconut milk into the curry.
- Press SAUTE mode on NORMAL for 2 minutes and allow the curry to gently simmer.
- Finish with chopped cilantro.
- Garnish with roasted peanuts and serve hot alongside jasmine rice.
Video
For Instant Pot & Air Fryer Recipes
Instant Pot timings may vary based on your geographic location. Air fryer settings and timings may vary based on the capacity and the model of the Air fryer.
Disclaimer
Nutrition values are provided here as a courtesy and are only a rough guide. Please consult a health care provider if you have any concerns.


 After 5 minutes, open the lid and continue to cook for 3 to 4 minutes on medium heat until the potatoes begin to turn golden around the edges and all the water evaporates completely.