

How To Make Broccoli Manchurian?
Broccoli Manchurian or Broccoli in Manchurian Sauce is no deep-fry Indo-Chinese Vegan And Gluten Free

Broccoli Manchurian is a simple no fuss Indo- Chinese dish that is made with blanched broccoli florets and a sauce that requires very basic ingredients that are easily available in the pantry. This recipe calls for a very few ingredients unlike other Indo- Chinese recipes and is adapted from the Tarla Dalal Website. I made this no deep fry broccoli manchurian the first time long back when i was pregnant with Lil A. I even remember relishing that meal with some paneer fried rice and a fresh cabbage and avocado salad. We’ll come to the salad part later. But for now, please let me reminisce the beauty of this broccoli manchurian. One thing i hate most about making manchurian is that it involves deep frying. Which only means two things- calories and longer time in the kitchen. Both of these never work well for me. And that is why this broccoli manchurian is a winner in my kitchen each and every time i make an Indo-Chinese meal. Plus, a delicious way to add broccoli to our diet?
While the original recipe is made with paneer, i have used broccoli florets here and i have been successful in using fresh tofu or cauliflower in this recipe too. You can also make this broccoli manchurian ahead and reheat it later when you serve. In that case, please make sure you add some water and adjust the salt accordingly because the sauce thickens a bit after it cools down. If you really must try replacing the broccoli with anything, then tofu is my best bet because tofu soaks up all that umami flavor so well.
If you try this recipe or any other recipe from this website, make sure you post a pic on Instagram with the hash tag #tomatobluesblog. Seeing your pics is the happiest thing ever for me. For more food related ideas and inspiration, follow me on Instagram using my handle tomatoblues.

Recipe For Broccoli Manchurian Or Broccoli In Manchurian Sauce

Broccoli Manchurian Recipe- No Fry Manchurian
Ingredients
- Broccoli florets 1.5 c
- Ginger 1 tsp grated
- Garlic cloves 3 to 4 minced finely
- Dark soy sauce 1.5 tbsp
- Chili- garlic sauce 1 tbsp
- Sugar 1 tsp
- Salt to taste
- Cornflour 1 tbsp
- Water 1 c
- Sesame oil 1 tbsp
- Spring onion whites 2 tbsp chopped
- Spring onion greens 1 tbsp chopped
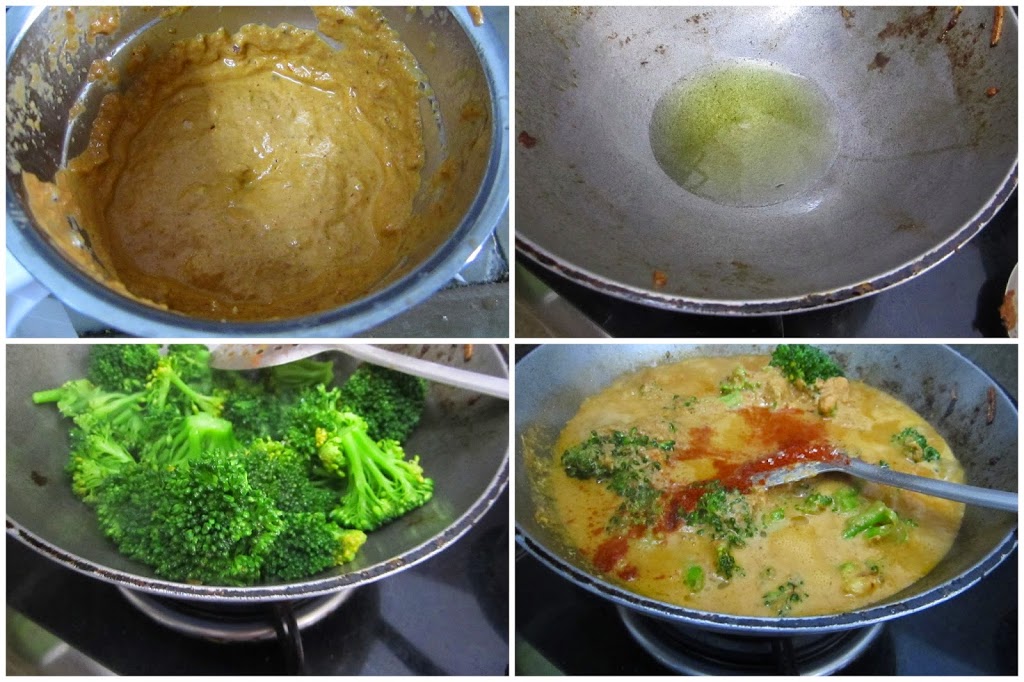
Instructions
- Heat a pan with enough water to immerse the broccoli in.
- Once the water comes to a rolling boil, dunk the florets in and switch off flame.
- Cover the pan and let it rest for 5 mins.
- After 5 mins, drain water completely and rinse the florets in cold water. Set aside.
- Heat a pan with 1 tbsp oil.
- Add spring onion whites, garlic and ginger and saute till garlic browns.
- To this, add the soy sauce, sugar and chili garlic sauce and mix well.
- Now add the broccoli and salt and mix well.
- Keep a tab on the amount of salt as all the sauces contain salt.
- Mix 1 tbsp corn flour with 1 c of water thoroughly and add to the pan.
- Mix well and simmer till the mixture turns glossy. This should take 3 mins on medium flame.
- Garnish with spring onion greens.
- Serve hot with fried rice or noodles.
Notes
For Instant Pot & Air Fryer Recipes
Instant Pot timings may vary based on your geographic location. Air fryer settings and timings may vary based on the capacity and the model of the Air fryer.
Disclaimer
Nutrition values are provided here as a courtesy and are only a rough guide. Please consult a health care provider if you have any concerns.


 Recipe For Fresh Fig Milkshake


